

What to Do When Your Hard Disk Runs Out of Space

Your hard drive once seemed impossibly huge, but now you’re running out of room. What can you delete safely? Maria Langer helps you decide how to perform triage on both data and Mac system files.
It’s happened to all of us. We buy a new computer with a hard disk so big we’re convinced we could never fill it up. Six months or a year later, we wonder where all that free space went and we worry about having enough space for the next six months.
Before you run out and get a new hard disk, you can do a few things to free up space on the hard disk you already have. If you offload the things you really don’t need, you might wind up with enough room to put off that new hard disk purchase until you’re ready for a whole new computer.
In this article, I explain how to find and delete files that are unnecessarily filling up your hard disk so you can free up space for new files. I start with the easy stuff — the document files you can archive and take off your hard disk because you really don’t need them there — and work my way up to unused application and system files that probably shouldn’t be on your hard disk in the first place.
NOTE
Throughout this article, I instruct you to delete files. If you think there’s any chance that you might need these files in the future, back them up before you delete them. Although you might have a program that can recover accidentally deleted files – or perhaps you use Time Machine, which is a great tool for doing just that – assume that once a file is deleted, it’s gone for good. Don’t come crying to me if you deleted something you meant to back up and now it’s just a ghostly memory of bits and bytes residing in computer heaven.
Take Out the Trash
If you’ve used a Mac for any length of time, you should know that items you put in the Trash stay there – and on your hard disk – until you empty the Trash. This is pretty basic stuff and I shouldn’t have to tell you.
If you’re brand new to a Mac and don’t know how to do this, it’s easy. Here are three different ways to get the job done:
-
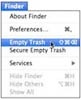
•In the Finder, choose Finder > Empty Trash (Figure 1).
-
•Figure 1 To empty the Trash, choose Finder, Empty Trash.
-
•In the Finder, press Shift-Command-Delete.
-
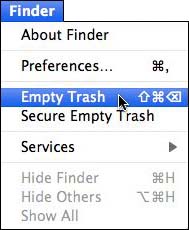
•With any application active, point to the Trash icon in the Dock, hold down the mouse button, and choose Empty Trash from the menu that appears (Figure 2).

Figure 2 You can also use the Trash’s shortcut menu to empty the trash.
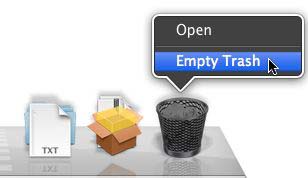
What you might not know, however, is that some programs maintain their own separate Trash. iPhoto is a good example. When you delete a photo in iPhoto, it goes into iPhoto’s Trash “folder.” You can view the contents of its Trash by selecting the Trash item under Recent in the sidebar. As shown in Figure 3, when the Trash is selected, the total number of items and the disk space they occupy are shown at the bottom of the sidebar. When you empty iPhoto’s trash, you permanently remove these items from disk.

Figure 3 iPhoto has its own Trash.
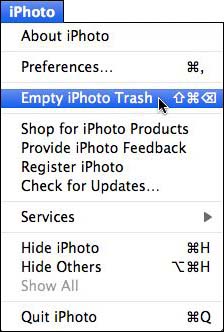
To empty iPhoto’s trash, choose iPhoto > Empty iPhoto Trash (Figure 4) or press Shift-Command-Delete. Click OK in the dialog that appears. The items are permanently removed from iPhoto – and your hard disk.
Figure 4 Choose iPhoto > Empty iPhoto Trash.
iPhoto isn’t the only application with its own Trash. Check the documentation for the applications you use, or just peek under the application or File menu. That’s usually where you find commands related to an application’s internal Trash.
Clear Off Your Desktop
If you’re like me, your Mac’s desktop is a minefield of file and folder icons. What is all that junk? Do you need it all? Go through it all, file the keepers, and delete the junk. Then empty the Trash.
Don’t do what I do, which is to wait until there are too many icons to actually find new ones that arrive and then file them all in a Desktop Junk folder on the Desktop. That just shuffles the junk around; it doesn’t eliminate it and clear out disk space.
As I type this, almost 1 GB of disk space on my main Mac is taken up by 539 files on my Desktop, most of which are in a Desktop Junk folder I created to keep them out of the way. Very dumb!
Clear Out the Downloads Folder
In the most recent Mac OS X versions, files you download from the Web are usually saved to the Downloads folder. You can find this folder inside your Home folder. You may even have an icon for it in the Dock.
Have you ever looked inside this folder? It contains all the files you downloaded, even the ones you didn’t think of as downloads at the time. For example, when you click a Web page link that displays a PDF file, that PDF file is downloaded to your computer and stored in – you guessed it – the Downloads folder. You’ll also find Quicken or QuickBooks account download files (if you use the Web connect feature), image attachments to e-mail messages that you may have saved by clicking the Save button in Mail, and countless other files you may not realize are on your computer.
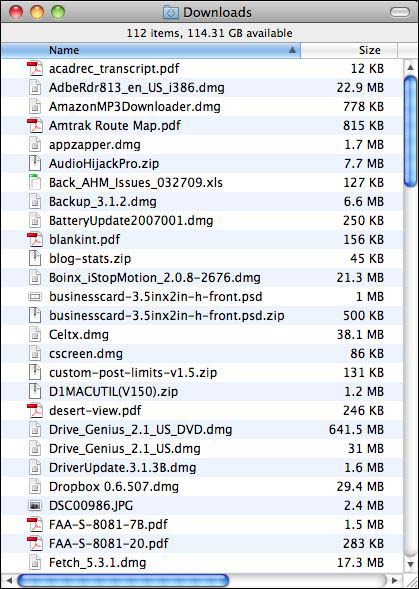
As I type this, there’s 2.72 GB of disk space taken up by the 112 files in my Downloads folder (Figure 5) – and I routinely weed out the junk.
Figure 5 Is your Downloads folder full of junk you don’t need?
Roll up your sleeves and dive into that folder. Delete the files you don’t want or need. Move the ones you do want to a more appropriate location on your hard disk or back them up to a CD or other media. Then empty the Trash.
Clean Up iTunes
It’s likely that one of the first things you did when you began using iTunes was to rip your CD collection into iTunes so you could listen to songs you already owned on your Mac or iPod. But let’s face it: Do you actually listen to all that music? Most albums contain at least one or two songs that you’d really rather not hear. Why in the world would you keep copies of them in iTunes, occupying disk space better used for other things? (Like, say, more music.)
Go through iTunes and delete the songs you really don’t want to listen to. And while you’re there, go through your library of movies, TV shows, podcasts, and audio books. Remove the items you don’t need on disk; remember, you can archive them to CD or DVD if you think you might want to access them in the future. Video should definitely go if you don’t expect to view it again; it takes up a ton of space on hard disks.
One more thing. If you have a lot of music in iTunes, you’re likely to have a few duplicates. With iTunes active, choose File > Show Duplicates. iTunes displays all items with duplicate names. As shown in Figure 6, that doesn’t necessarily mean they’re the same. Manually go through the list and delete the duplicates. When you’re finished, click Show All at the bottom of the window to show all songs again.
Figure 6 iTunes can list duplicate files, but are they really duplicates?
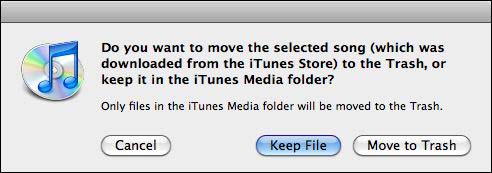
And remember, anytime you delete something from iTunes, if you’re asked whether to move it to the Trash or keep it in the iTunes Media folder, click Move to Trash (Figure 7). Otherwise, it will remain on your hard disk, which defeats the whole purpose of deleting it to regain disk space. Don’t forget to empty the Trash.
Figure 7 Click Move to Trash to free up disk space.
Weed Out Your Photo Library
Digital cameras are great. They make it possible to shoot 250 photos of your kid’s soccer tournament at the same cost as shooting 25 photos of this momentous event. So what do you do? You shoot 250 photos!
But are all of those photos really worth having? The blurred ones? The ones where you cut off your kid’s head? Or photographed the wrong kid? Or snapped just as the woman in front of you jumped up to cheer her kid?
In other words, do you really need to keep every photo stored on your computer?
Go through your photo library and delete the photos you know you’ll never look at again. Or, better yet, back up all of an event’s photos to CD or DVD and then just keep the top 10% of them on your computer. Delete the rest. You can always pull them off the backup if you need them. (And remember, if you keep your photo library in iPhoto, empty iPhoto’s trash after deleting them.)
You’ll be amazed at how much disk space those 10 megapixel images take up. Right now, my main Mac has over 10 GB of hard disk space occupied by over 10,000 images I need to weed through and delete. And don’t even get me started on what I’ve imported into iPhoto. What’s lurking in your photo collection?
Clear the Cutting Room Floor
If you have a video camera, you likely have a lot of movie clips sitting on your hard disk waiting for you to do something with them. Or maybe you’ve used iMovie or some other editing tool to create movie projects and movies to share with others.
Do you really need all that stuff on your hard disk? As with the photos, back up the clips or movies you want to keep to CD or DVD. Then delete the ones you don’t need. You can always pull them off your backup discs if you feel a burning desire to watch your nephew’s ballet performance.
If you use movie editing software, such as iMovie or Final Cut Pro, open the application to see what projects it lists. Some of these applications have internal mechanisms for deleting files. For example, iMovie can move events, unused clips, and rejected clips to the Trash from within the program. This might be a good way to clear out junk without messing up projects you might want to work with again in the future. Consult the documentation to see how it handles the removal of clips and other content.
If you use an HD video camera, you may want to check out Roxio’s Toast Titanium ($100 retail ). It offers “one-click” backup of AVCHD video to disc, so you can put these files on a DVD until you’re ready to use them.
Oh, and one more thing. We all know how fun it is to collect movies e-mailed to us by other people. But do you need them all on your hard disk? Archive your niece’s piano recital and your brother’s trip to Disneyland to a CD or DVD and remove them from your hard disk.
Get Rid of E-Mail and Attachments
That brings up another hard disk junk heap: e-mail. If your e-mail client is set up to store copies of e-mail messages and attachments on your computer locally, whatever you see in your e-mail client is taking up space on your hard disk.
Lots of people talk about “in-box zero,” but your e-mail in-box is only part of the problem. As you go through your in–box, you file messages and their attachments into subfolders. Those messages and files still reside on your hard disk.
Worse:I If you save an attachment to a folder on disk, that attachment resides in two places on your hard disk: your Mail Attachments folder and the folder to which you saved it.
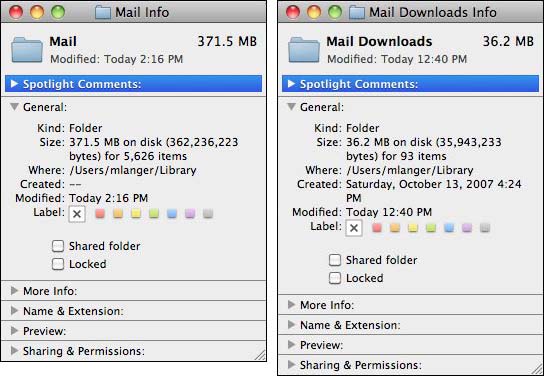
Want to get an idea of how bad the situation is? If you use Mail, use the File > Get Info command on two folders in the Library folder inside your Home folder: Mail and Mail Downloads. As shown in Figure 8, these two folders occupy over 400 MB of hard disk space on my computer’s hard disk. How much space are they hogging on yours?

Figure 8 The Info windows for the Mail and Mail Downloads folders can tell you exactly how much disk space is occupied by e-mail messages stored on your computer.
The best way to free up space in your e-mail client is to simply delete the messages you no longer need to keep. But don’t just go through your in-box. Be sure to check all the subfolders you may have created to organize your mail. Then, when you’re finished, check the software’s Trash folder; Mail has one. In Mail, use the Mailbox > Erase Deleted Items > In All Accounts command to clear out the deleted messages for good.
Worried that Murphy’s Law will strike and that you’ll need a message after you’ve deleted it? If you use Mail, you can archive a mailbox to disk. Select the mailbox and choose MailBox > Archive Mailbox to get started. Once you save the file to disk, you can back it up onto a CD and remove the file from your computer.
Simplify Your Fonts
One thing that bugs me about major software manufacturers like Microsoft and Adobe is the way they always seem to install a big bunch of fonts with their applications. Add enough of these programs to your computer and your list of fonts exceeds your scrolling patience when you need to find one.
Unless you’re a designer and actually need dozens of fonts for your design work, take a closer look at the installed fonts and remove the ones you don’t need. Again, you can back them up before deleting them so you can always reinstall them if you need to.
Mac OS X comes with a good tool for working with fonts: Font Book. Use Font Book to browse through your installed fonts. Select a font or font family to remove and press Delete. Font Book moves the associated files to the Trash. Quit Font Book, empty the Trash, and you’re done.
To copy the font files to another folder for backup before deleting them, choose File > Export Fonts and specify a folder to copy the fonts to. Once the files have been exported, you can delete them from Font Book. Then back up the exported fonts and delete them from your hard disk.
What’s great is that Font Book can flag duplicate fonts and help you resolve them. As shown in Figure 9, Font Book displays a yellow triangle beside duplicate fonts. You actually have two copies of the flagged font and you certainly don’t need both. Choose Edit > Select Duplicated Fonts to select the affected fonts and font families. Then choose Edit > Resolve Duplicates. You can then go through the list of fonts and delete all the ones that have been marked as Off. I just went through this exercise and regained 6.4 MB of hard disk space, just by deleting duplicate fonts I don’t need!
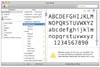
Figure 9 Font Book displays a yellow triangle beside duplicate fonts.
Best of all, Font book won’t let you delete a System font – one that’s needed by Mac OS X or other applications to function.
Find and Delete Duplicate Files
Saving e-mail attachment files without deleting the e-mail message is just one way to duplicate a file on your hard disk. Sometimes you can create duplicate files by copying files to one disk location, forgetting you put them there, and then copying them again to another location.
It doesn’t matter how a duplicate file got onto your computer. What matters is that it’s there and the file takes up twice the amount of space it needs. Duplicate files can really eat up your disk space – especially if they’re big, fat files like PowerPoint slide decks, images, or movies.
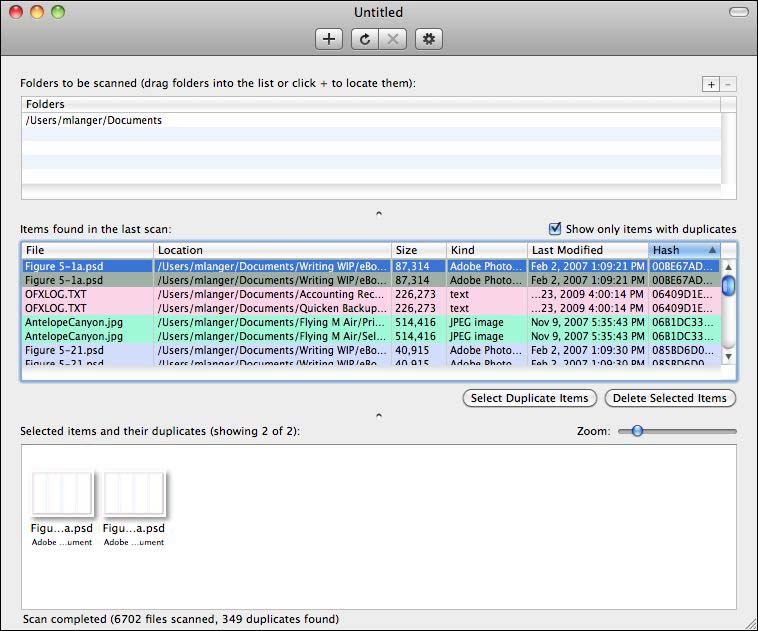
The trick is finding the duplicates. While you could go through your hard disk manually and look for duplicate files, you might prefer software that can do it much more quickly. Arazis Ltd.’s Find Duplicate Files ($15) is one such tool. You can drag one or more folders into a list, then the utility searches through the folders to find duplicate files. What’s neat about Find Duplicate Files is that it compares what’s in the file, not the file name. It then displays all versions of the duplicate file (Figure 10). Click a button to select the copies, and click another button to delete them.
Figure 10 Find Duplicate Files lists all versions of duplicate files it finds folders you specify.
Personally, I’m a bit leery of depending on software to delete duplicate files. In looking through the list Find Duplicate Files found for me, I realized that I actually do need duplicate copies of many of the files it found – and it found over 349 of them in my Documents folder alone! However, many duplicates are images that are linked to different versions of InDesign page layout files. Deleting the linked files would break the links and cause all kinds of headaches if I wanted to work with the InDesign files that relied on them.
But do I really need the older versions of these InDesign documents on my hard disk? I don’t. So I might be better off archiving and removing the folders for each of these documents and then running Find Duplicate Files again to see what else it finds.
Clear Out Unnecessary Language Files
One of the great things about Mac OS – as far as developers are concerned, anyway – is the fact that it’s a multi-language operating system. If you’re a programmer and want your language to display menus in a variety of languages, all you need to do is include language files for each language you want to support. This sure beats releasing multiple versions of the same program.
Unfortunately, since language files are often included with software, your hard disk may include the files to display menus in Albanian or Bulgarian or Persian in one or more applications. Is this something you need? I doubt it.
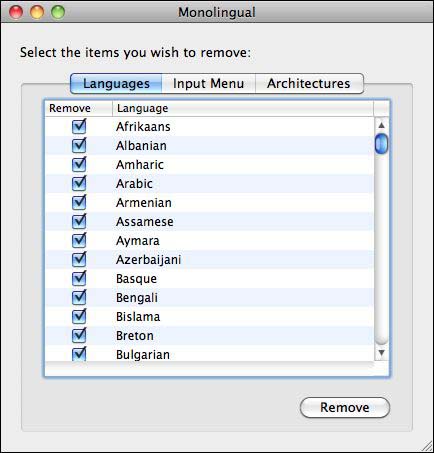
You can often free up disk space by deleting these language files. An open source software program called Monolingual (free) makes this very easy to do. Just launch the program and turn on the check boxes for each language you want to remove (Figure 11).
Figure 11 Monolingual lets you check off the languages you don’t need.
By default, it selects all the languages that are not listed in the Language panel of the Language & Text preferences pane. Click the Remove button, then click Continue (if you really want to continue) in the Warning dialog that appears. You’ll have to type in an administrator password, too. Then sit back and let Monolingual go to work. When it was finished on my computer, I’d regained roughly 2 GB of hard disk space.
Find and Delete Big, Fat Files
In performing the cleanup tasks recommended so far, you may have missed one or more really large files that you don’t need to have on disk. Use the Finder’s Find feature to search for files with a Size greater than an amount you specify. Figure 12 shows an example of the files on my hard disk greater than 100 MB in size. It found 142 of them! If I deleted them all, I’d regain 14 GB of hard disk space.
Figure 12 Big, fat files lurk in the dark spaces on everyone’s hard disk.
While I’m not suggesting that you delete files just because they’re big, I am suggesting that you consider them first if you’re interested in freeing up some space quickly. In this example, I found a bunch of old television episodes in iTunes and some raw video files. Do I need them on my hard disk? Can I archive them to DVD and delete them from my hard disk? Or maybe I can just delete them and forget they every existed? (Heck, I can watch old episodes of Monk or Battlestar Galactica on Netflix or Hulu.)
Uninstall Unused Applications
All too many of us have been sucked in by the latest software promo offered by numerous organizations on the Web. You know the ones I mean. You pay one low price and get 10 or 12 software programs, only one of which you’re really interested in. Yet you download them all and may even install them. After trying them once or twice, you never open them again. They languish on your hard disk, taking up space that could be used for other files.
Or you may have other applications that you installed and used to use – but no longer need. Maybe additional Web browsers or text editing applications. Or games – we all know what disk hogs they can be. Did you recently switch from Microsoft Office to iWork? If so, you might consider removing the 950 MB worth of files in your Microsoft Office 2008 folder.
There are a few things you need to consider before removing applications:
-
•Does the application’s folder contain any documents you created and need to save? If you’re smart, you save your documents inside the Documents folder in your home folder and this should not be an issue.
-
•Is the application registered or activated for use on your computer? If so, you might want to unregister/deactivate it so you can use it on another computer. Adobe Photoshop is a good example. It’s licensed for use on two computers owned by the same person and has to be activated on each computer. If you delete it without deactivating the software first, you might not be able to use it on another computer later. Be sure to deactivate before uninstalling.
-
•Most applications create preferences and settings files that they store in other locations on your computer’s hard disk. To uninstall properly, you need to remove these files as well.
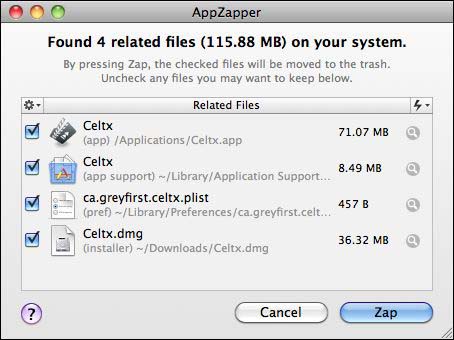
Some applications include their own uninstallers that can cleanly remove the applications and their support files from your computer. Most don’t. I use a program called AppZapper by Austin Sarner and Brian Ball ($12.95) to uninstall the programs I no longer use. It’s pretty straightforward: simply drag the main application onto the AppZapper icon. AppZapper launches and displays a window with the application and all of its support files (Figure 13).
Figure 13 AppZapper lists not only the application you want to delete but its support files, which were likely buried in various system folders.
Click Zap and the application and support files are deleted. (And yes, you can disable that annoying zap sound effect.)
f All Else Fails, Nuke It
This may sound drastic, but there’s one thing you can do that’ll not only clean out all the files you don’t need, but help your Mac to run better. I call it the “nuclear option”: back up all your documents and format your hard disk. Then reinstall all of your applications and just the document files you need. If you’re honest with yourself and don’t put the same old junk back on your hard disk, I guarantee you’ll regain at least half your hard disk space.
This task, however, is not something you can do in a few minutes. As you might know if you’ve ever had a hard disk failure and were forced to do this, it could take a whole day or more. But there’s no denying that your hard disk will look huge and empty again when you’re done.
Look at it this way, though: If your home’s closets, cabinets, and garage were dirty and cluttered, would it be easier to simply clean them out or to move all your stuff out, bulldoze your home, rebuild from scratch, and move your stuff back in?
I know which task I’d prefer.
My Advice
My first bit of advice is to never let your hard disk fill up. If you always archive and remove files you don’t need to have on your hard disk, you’ll never be faced with the problem of running out of space.
But since you probably won’t do that – who does? – try this: The next time you’re on hold waiting for customer service or technical support, pick one of the areas I covered in this article and follow the instructions I provide to remove the clutter. If you do this once a week, you should be able to prevent your hard disk from becoming too full to get work done.


Macintosh Special Interest Group (MacSIG)
