

Terminal


Get extra mileage from your Mac using OS X's Terminal.
Terminal (in Applications/Utilities) gives you direct access to the UNIX system that underpins Mac OS X. By typing specific commands into your Terminal window, you can make changes, open settings, or access features that aren’t available by any other means.
After typing one of the commands listed here, press Return to activate it. Commands split over two or more lines should be typed in their entirety--don’t press Return halfway through. And bear in mind that some commands are case-sensitive, so be true to exactly what’s printed here. One final warning: All the tips in this feature have been thoroughly tested, but experimenting with the Terminal is not a task to be undertaken lightly. Don’t try to modify or adapt these commands unless you really know what you’re doing.
1. iRobot
Your Mac can talk to you. Using a robotic voice reminiscent of a 1950s sci-fi flick, it can ask after your health, tell you a joke, or say anything else you care to type. It’s a simple trick. Just open the Terminal application and enter: say Mac Life
And the Terminal robot utters the name of this magazine. Obviously it doesn’t have to be Mac|Life--type anything you like. Give it a go; it’s fun.
2. Back Up at Will
By default, Time Machine backups take place every hour, but you can change this through the Terminal. To make it back up every half hour instead, simply type: sudo defaults write /System/Library/LaunchDaemons/com.apple.backupd-auto StartInterval -int 1800
The 1800 at the end of this command is a half hour, expressed in seconds. You can change this figure to suit: For example, to back up once an hour again, replace it with 3600, and for two-hour backups, use 7200. Always remember to be especially careful with commands that begin with “sudo.” These are system-level commands that can cause huge problems if misused, which is why you’re asked for your administrator’s password the first time you try one.
3. Login Greetings
Another sudo (and therefore dangerous) command enables you to add a message to the login window. In the Terminal, type: sudo defaults write /Library/Preferences/com.apple.loginwindow LoginwindowText “Your Message”
Replace Your Message with whatever it is you want to display, of course, but leave the quotation marks around it intact, and be careful with your punctuation. Some characters (exclamation points, for instance) stop the command from working.
To remove the message, type: sudo defaults write /Library/Preferences/com.apple.loginwindow LoginwindowText “”
4. Play Games in the Terminal
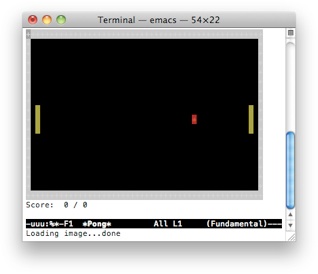
A variety of simple games--like Pong--are accessible via the Terminal.
As you may know, OS X is UNIX-based. Emacs, a text editor, forms part of the UNIX system, and it contains some Easter egg games, including the ever-popular Tetris, Pong, and Snake. First you must find your Emacs version number. In the Terminal, type: cd /usr/share/emacs/
Press Return. Now type ls (lowercase LS) and press Return again. You’re given your Emacs version number (1.21, for instance). Write it down. Then enter the following: ls /usr/share/emacs/[VERSION]/lisp/play
Replace [VERSION] with the number obtained earlier (no parentheses). You get a directory of all the available games. Make a note, or take a screenshot. Now switch to Emacs through Terminal by simply typing emacs. To access the games, press Escape, then X, and type the name of the game you want to play before pressing Return. You can switch to the next game by pressing Escape, X, and the name of the next game. Have fun!
5. Fix Window Sizes in FFView
A. Resize Problem
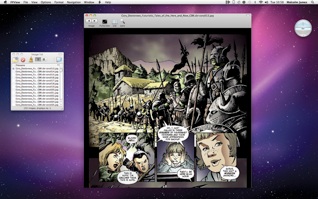
FFView (www.feedface.com/projects/ffview.html) is a great sequential image viewer, perfect for comics, but its Pagewidth Mode resizes its window every time you turn to the next image. This is very annoying if you want to set--and stick to--your own window size.
B. Resize Resolution

Terminal solves the problem. Type: defaults write com.feedface.ffview udn_dont_resize_img_win 1
The window now remains a constant size. To reverse this, enter the code again, replacing the 1 at the end with 0. Now restart the app.
C. Want Comics?
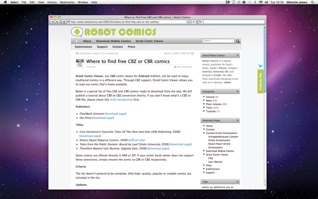
There’s a wealth of downloadable free comics available on the web. For example, mobile comic publisher Robot Comics offers a list of high-quality, free-to-download material suitable for reading on your Mac with FFView. Check it out at http://tinyurl.com/dk8ell.
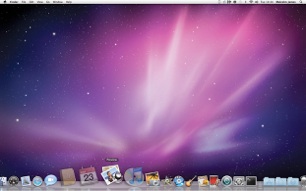
6. Get a Massive Dock
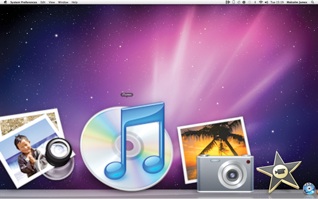
If you want giant-sized magnified Dock icons, enable Magnification in System Preferences > Dock, and in the Terminal type: defaults write com.apple.dock largesize -int 512; killall Dock
This increases their maximum size to 512x512 pixels. You can substitute another figure if you wish, but don’t go any higher than 512. To switch this effect off, just return to the Dock’s preferences and move the Magnification slider back.
7. Hybrid Dock Folders
For a different version of a Dock folder or Stack’s List option, type: defaults write com.apple.dock use-new-list-stack -boolean YES; killall Dock
This gives you an interesting hybrid of the List and Grid viewing options. Your List view icons are bigger, and if there are more items than fit the window, you can scroll through them in the same way as you would in Grid view. Also like Grid view, clicking a folder now opens it within the Stack. If you find you don’t like these changes, type the command again, replacing YES with NO.
8. Inspect the Web
Safari’s Web Inspector offers a great deal of detail about web pages, and it’s invaluable for serious web developers. You can activate it using Safari’s Debug Menu outlined in No. 11, but if you only want the Web Inspector, type: defaults write com.apple.Safari WebKitDeveloperExtras -bool true
After restarting Safari, you can now access the Web Inspector by right-clicking a web page and selecting it from the contextual menu. As you might guess, you can deactivate this feature by repeating the command, but replacing true with false and restarting Safari.
9. Debug iCal
Like many OS X applications, iCal has a Debug mode that can be activated through Terminal. Type: defaults write com.apple.iCal IncludeDebugMenu YES
A new menu bar pull-down titled Debug appears. You can hide it again by repeating the code but replacing YES with NO. iCal must be restarted for changes to take effect.
10. Debug Address Book
Address Book also has a hidden Debug menu. To enable it, type: defaults write com.apple.addressbook ABShowDebugMenu -bool YES
The Debug pull-down appears in the menu bar. To disable it again, repeat the command and replace YES with NO at the end. The application must be closed and restarted for these commands to take effect.
11. Quick Tip

To enable a debug menu in Safari 4, type: defaults write com.apple.safari IncludeInternalDebugMenu 1
Quit Safari and restart it for the hack to take effect, giving you an extra menu bar pull-down labeled Debug. To get rid of it again, repeat the command, replacing the 1 at the end with 0. A restart is again required.


Macintosh Special Interest Group (MacSIG)
12. Enable X-Ray Folders in Quick Look
A. Folders Can Look Dreary
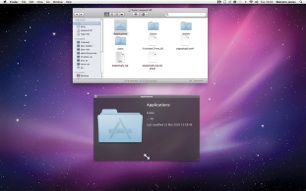
If you highlight a file in the Finder and press the Space bar, you activate Quick Look, giving you information about the item in question and possibly a preview of the file. Folders look pretty dull in Quick Look, as you can see here.
B. See Through the Veil
Fortunately, you can spice up your folder-viewing experience, and Terminal is the way. To make Quick Look give you an X-ray image of a folder, simply type: defaults write com.apple.finder QLEnableXRayFolders -boolean YES
C. X-Ray Vision is Yours

Quick Look now offers an X-ray view of a folder with an icon that shows you what’s inside it. To disable this feature, type the command again, replacing YES with NO. Quick Look folders are returned to their customary state.
13. Quick Tip
To turn the Dock icons translucent for applications that are open but hidden, type: defaults write com.apple.Dock showhidden -bool YES; killall Dock
Repeat the command, replacing YES with NO to disable this feature. Icons for applications that are already hidden when you activate this feature will not appear translucent unless you show and then hide them again.
14. Recently Used
This somewhat intimidating code introduces a new stack into your Dock, showing a list of your recently used applications: defaults write com.apple.dock persistent-others -array-add ‘{ “tile-data” = { “list-type” = 1; }; “tile-type” = “recents-tile”; }’; killall Dock
Type it carefully. It’s a really useful feature. When the new stack is in your Dock, you can right-click it and change it from showing Recent Applications to Recent Documents, Recent Servers, Favorite Volumes, or Favorite Items. It can be displayed in Fan, Grid, or List view, just like a regular stack. If you want to get rid of it again, just drag it out of the Dock.
15. Exposé Your Dock
By default, clicking and holding on the Dock icon for an active application in Snow Leopard activates Exposé, showing all of that application’s currently open windows. In Leopard, of course, this gave you a contextual menu; that’s something you can access in both operating systems by right-clicking on the icon in question. If you’re running Snow Leopard but prefer Leopard’s way of doing things, type the following Terminal command: defaults write com.apple.dock show-expose-menus -boolean NO; killall Dock
Repeating the command with YES instead of NO returns your Dock’s Exposé functions to normal.
16. Grid View Highlights
If you open a stack in Grid view, you can navigate through its enclosures using the arrow keys, and the currently selected icon is highlighted by a gray gradient box. However, if you drag your mouse pointer over the grid, no such highlighting appears unless you use this Terminal command: defaults write com.apple.dock mouse-over-hilite-stack -boolean YES; killall Dock
You now get the same gray background box during mouseovers as you do when navigating through the grid using the keyboard. Replace YES with NO to switch this off again, though we doubt you’ll want to.
17. Dock the Gloss
If you’re not too keen on the 3D Dock, with its shiny glass finish showing reflections of the application icons, use this tip to switch to something a little simpler: defaults write com.apple.dock no-glass -boolean YES; killall Dock
Your Dock background is now a much plainer translucent black design with a thin white outline. Icons are no longer reflected in the Dock, and open applications are indicated by a white dot instead of a blue floodlight. If you decide you prefer the 3D look after all, you can repeat the command, substituting NO for YES, so you’ve nothing to lose by giving it a go.
18. Search Your Music
When you highlight a track in your iTunes library, you get a right-facing arrow in a circle. Clicking this searches the iTunes Store for similar material. However, using this Terminal input, you can get it to search your library instead: defaults write com.apple.iTunes invertStoreLinks -bool YES
Restart iTunes to activate it, and repeat the command with NO replacing YES to switch things back to their default behavior.
19. Drag Dashboard Widgets onto Your Desktop
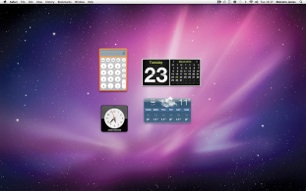
Liberate your widgets from the Dashboard--place them on your desktop instead.
One of the most interesting Terminal tips enables you to drag your widgets out of the Dashboard and onto the desktop, where they float above open applications and Finder windows, akin to the Gadgets in Windows Vista’s sidebar. To activate it, type: defaults write com.apple.dashboard devmode YES
You must then log out and log back in, or restart your machine. You can now capture a widget by clicking and holding it, and pressing F12 to dismiss the Dashboard and drop it on your desktop. By capturing a widget that’s on your desktop and pressing F12, you can return it to your Dashboard too. Widgets placed on the desktop function just like they do on the Dashboard.
To disable this feature, repeat the command, replacing YES with NO. Again, you must log out and log in again or restart your Mac for the change to take effect, after which widgets that are already on the desktop can be returned to the Dashboard, but there they must remain.
20. Expanded Save View
The Save command brings up a dialog where you choose a filename, save location, and sometimes the format in which it will be saved. Next to the title, there’s a blue button with a triangle pointing down. Pressing this expands the dialog, giving it a similar format to a Finder window. If you want this window to appear in its expanded form by default, type: defaults write -g NSNavPanelExpandedStateForSaveMode -bool TRUE
If needed, just replace TRUE with FALSE to revert to how things were.
21. Faster Screen Sharing
MobileMe’s Screen Sharing is an excellent feature, but depending on your internet connection, it can be very sluggish. Thankfully, you can speed it up by using a Terminal command to reduce the image quality of the shared screen: defaults write com.apple.ScreenSharing controlObserveQuality 1
This reduces the screen to its lowest possible quality setting, giving you a black-and-white image. You can replace the 1 at the end of the command with the numbers 2 to 5, offering progressively higher-quality screens: 2 gives a grayscale image, 3 offers 8-bit color, 4 is 16-bit color, and 5 takes you back to full color, the default setting.
22. Screenshot Names
If you capture a screenshot in Snow Leopard, it’s automatically titled “Screen shot” followed by a date and time. You can change this using a Terminal command: defaults write com.apple.screencapture name “Anything you like”; killall SystemUIServer
Simply change Anything you like to whatever you wish to call the screens you capture--the date and time remain unchanged. To go back to the default, replace Anything you like with Screenshot.
23. Reveal Hidden Files
There are several applications that let you look at Mac OS X’s hidden files, such as resource forks, but there’s also a very simple command you can employ from the Terminal: defaults write com.apple.finder AppleShowAllFiles TRUE; killall Finder
Be careful with this one. Those files are hidden for a reason, and while it’s interesting to see what’s there, don’t fiddle with them unless you know what you’re doing. To turn off this feature, repeat the command, replacing TRUE with FALSE.
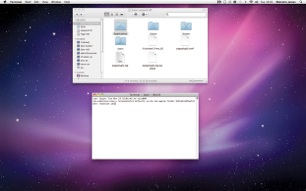
24. Copy, Gold Leader!
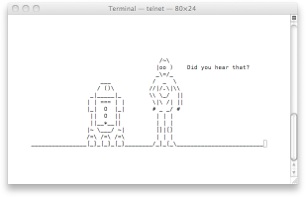
"They shut down the main reactor. We'll be destroyed for sure! This is madness!"
This must be the strangest Terminal command ever. Go on, type: telnet towel.blinkenlights.nl
You’ll see the Star Wars movie, retold in ASCII art. Wait for the prefilm credits to end, and don’t resize the Terminal window, or the graphics won’t format properly.
25. Quick Tip
With this handy command, you can quit the Finder in the same way you would any other app: defaults write com.apple.finder QuitMenuItem -bool YES; killall Finder
A Quit option now appears at the foot of the Finder menu. To remove it, type the command again, replacing YES with NO.
